Friday, May 25, 2012

recipe for a world geography co-op

Many people have told me how much they hated geography when studying it in school as kids. I'm always rather shocked; nerd that I was (ummm.....am), I always thought geography was awesome! History and economics and political science, blah blah blah, not so much, but places and the stuff that goes on there? And maps? Heck yes! When our homeschool group was deciding on the last co-op class of the year, I couldn't get geography out of my mind. What purpose does learning about Bolivia serve when kids (and adults) don't have a clue where Bolivia is? So I set out to create a world geography class to accommodate 19 kids ranging in age from 3 to 12, and I'll show you how you can do it for your co-op (or even just your own kids), too.


First, I had to get it through my thick head that Rome wasn't built in a day. Nineteen pre-school and elementary-aged kids crammed in my living room were not going to appreciate black and white copies of a National Geographic article on the construction of the pyramids, and trying to cover anything in detail was a lost cause. But what I could do for a group of that size and diversity was spark an interest in exploring geography later on at home, and that was my goal. The number one co-op planning rule is to be realistic about your expectations. I wanted this to be as fun and manageable as it was educational.

I jotted down a list of things kids pretty much everywhere seem to love : food, food, and food. Then I remembered that when my kids aren't busy eating, looking for snacks, or asking, "What's for dinner?", they also have an interest in animals, stuff that weirds their friends out, mysteries, and anything that takes up a lot of space. The younger ones also like making things, primarily messes. We tried a craft at the first class but it was met with a lukewarm reception so I scrapped that idea. Preteen boys aren't all that impressed by paper maracas.

Since there are seven continents, the class broke down neatly into a weekly six-week session. I couldn't picture dragging Antarctica out for an hour so I lumped it in with Australia. They're practically the same thing, right? ;) To keep costs down, I chose to draw out a map of each continent on 36" wide paper for wall display, and hand out a simple outline map to each kid as the continent was covered. National Geographic has a really nifty free program you can use to add the features you want (or want to omit) on each map. I also printed out a flag coloring page from the Crayola website and each week assigned a country to each child based on their level of abilities and how complex the flag was to color. The Crayola pages are neat because they show the flag, the outline of the country, instructions on coloring the flag, and a brief fact about the country. We used the states version of these for our Fifty States scrapbook last year. Since we weren't doing much bookwork, the only thing each kid had to bring was a pocket folder with brads. We love inexpensive projects!

Class debuted with North America. Even young kids are familiar with the United States, Canada, and Mexico, so it seemed like a friendly place to start. After handing out world and continent maps, we discussed the term geography and the kids had lots of great comments on what they felt it meant. Then I showed everyone that our North America map was missing all of its labels, and explained that the kids would have to find the labels, their flag page, and a surprise object using a treasure map (a quick sketch of my backyard). They practiced using cardinal directions and were able to take two-steps-north-five-steps-east to find their map labels, flag coloring page, and an object commonly found in/made by that country. Most of the objects were food : coffee for Guatemala, cocoa for El Salvador, bananas for Costa Rica. Every kid got a chance to come up and show their object to the group, and then find the country on the big display map which matched their label and add the label. Flag pages were taken home as "homework" to color. Finally, we had a snack of popcorn. There are about a million great treats that would go along with North America but I was too pressed for time. Don't be like me! Something like Coca Cola cake would have been awesome.


The following week, we met again to learn about South America. Everyone got a continent map, and this time the kids were divided into three teams with a good mix of ages. I went over some very basic landform facts, asking the kids for input along the way, and then we had an open-map quiz bowl. As each team answered a question correctly, one of their team members earned a map label and corresponding flag page. Questions ranged from naming bordering oceans, finding the largest country, and pointing north on the map, to remembering the largest South American river and rainforest. During this class everyone colored their maps, and as they came up to affix the label to their country, they showed their classmates the finished flag. After all the labels were up, we enjoyed alfajores, a South American butter cookie sandwiched with dulce de leche. They were huge and messy (hugely messy?) but very tasty. Definitely use a 2" biscuit cutter and not a 3" cup like me!


Next was Europe. Let me tell you, Europe was no picnic! So many little countries with jagged edges and long, hard-to-spell-much-less-pronounce names. Since Europe has a lot more countries than we had kids attending class, I picked the least confusing ones out for them to label and attached the remaining labels ahead of time. For this class we focused on the many different languages spoken, and I made strips of paper with the word "hello" written in 19 different languages spoken throughout Europe, and we spread them out on my tile floor, one per square. Each kid got to come up and toss a beanbag onto one of the squares, and learn how to say hello in another language. Once again completing the activity earned a map label and flag, which was colored in class and later shared. As a treat after class we tried an apple strudel. Such a tasty recipe but maybe leave the raisins out. I had no idea so many kids were raisinphobes!


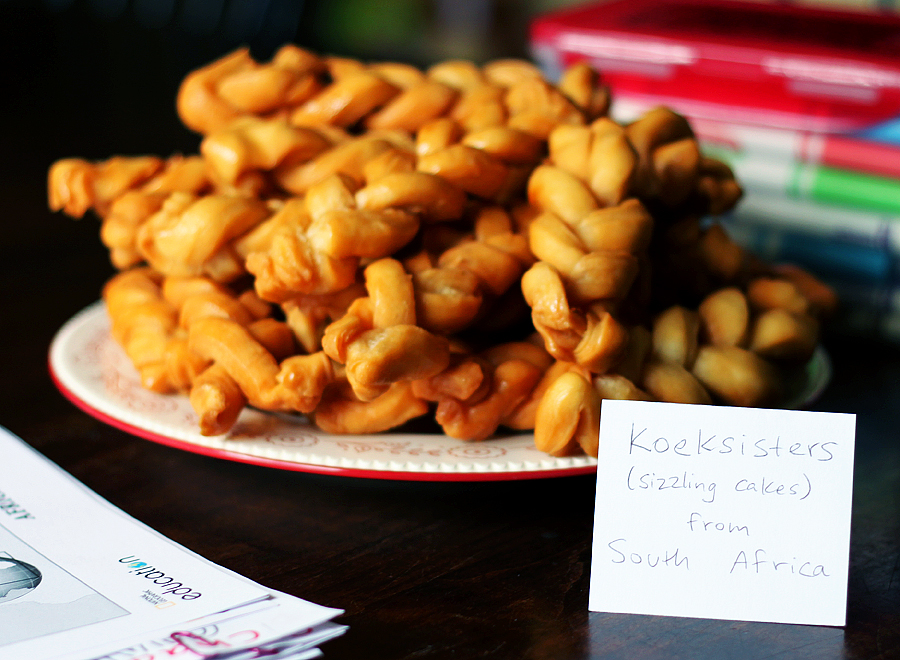
Our fourth class covered Africa. Like Europe, Africa covered more countries than we had kids so the easier to find countries were left for the kids to label and the remainder were pre-tagged. We own a glut of little plastic animals so I pulled out 5 different native African species for each team and drew each animal's footprints on separate index cards. A sixth card was numbered one through five with spaces for the kids to write the names of the animals as they decided which footprint belonged with which animal. This was my favorite activity, it was great watching the kids work together! Only the zebra versus giraffe prints stumped one of the teams. As the teams finished the activity they colored their flag pages, and then everyone did the usual labeling and flag sharing. The snack this day was a heaping plate of koeksisters. I wound up making three batches and we ate every one of them! Very interesting taste, sort of like a funnel cake.


Week five led us to Asia. I picked out the countries the kids would be covering and labeled the rest, and then researched in which year each kid was born so we could find out their Chinese zodiac sign. I hung up pieces of paper with the year and the Chinese symbol from 1999 to 2010 to cover the twelve signs and all of the birth years. We talked about the importance of a New Year's celebration in the U.S. and the differences in Asia, and then as each year was called, the kids born in those years came up and played silent charades until the other kids guessed the zodiac animal. Some of them like the rooster were hilariously difficult to act out silently! We added the kids' names to the symbol papers hanging on the wall, and I read out a few of the good qualities that are supposed to be associated with each year. After everyone was finished they labeled the map and opted to take the flags home to complete. I had a hard time finding a treat for Asia that would be palatable to kids, so I finally cheated and just bought fortune cookies and chow mein noodles.


The final class covered Australia and Antarctica. I only drew a map for Australia since our large world map showed the icy south quite nicely. I did hand out maps for both and we discussed the research stations housed in Antarctica. Since we were only covering three countries in Australia, I decided to make the last class a review of the world. I had all of the maps displayed around the room and we reminisced on learning about products grown or made in North America, landforms of South America, languages spoken in Europe, animals native to Africa, and the cultural celebrations in Asia. I was hoping that given the big picture, the kids would see some of the many things geography is all about. As a final activity, each team was given one country label from each continent's map (so six total per team) and they had to work together and use their folder of maps or the large world wall map to find out where the labels belonged. A few less-familiar countries took a little longer to find but in the end they got them all back up. Our last treats were lamingtons, an Australian sponge cake filled with jam and dipped in chocolate and dessicated coconut. They were surprisingly tasty, and huge! Even though I had cut them half the size recommended in the recipe, I had to cut the finished treats in half again to serve.


If you're thinking about hosting a world geography co-op, you should go for it! Seeing an interest sparked right before your eyes is incredibly rewarding. If you have the time and resources, this could be a springboard for much more in-depth learning on the vast array of cultures around the world. If you're teaching just a few kids, you could fully involve them in the mapmaking and cooking aspects. I know that after the summer break my kids will be making some lapbooks on other countries and they can use their maps and their taste of products, landforms, languages, animals, celebrations, and foods to decide what interests them. I can't wait!


Wednesday, May 16, 2012

4-H : a palette of fun

Ibis seems to get short shrift around here on the blog, mostly because she spends so much time outside dangling from the monkey bars and avoiding me, schoolwork, chores, and my camera. However, she did have a lot of fun completing an art-themed project book for 4-H this year and I managed to snag some evidence to share. This huge book called A Palette of Fun is available for free online and she tried out six of the activities. I think Coral joined in for all six as well, and even Alexei and Hobie took part in a few. Art is ageless!


First, the kids all worked together creating a giant mural for what was then our schoolroom wall. Painting directly on the wall wasn't an option but a huge piece of paper from a roll we snagged for fifty cents at a yard sale filled in nicely. We nicknamed this our "graffiti wall" because anyone was free to add to it as they felt inspired. Sadly I never took any photos as it grew more colorful.

In September Ibis broke her right arm (and of course she's right-handed)  and waylaid our plans for awhile. School was challenging and handwriting went right out the window. Oddly enough she soon discovered a real talent for painting left-handed and proceeded to paint over fifty different works while her cast was on. They are still some of my favorite paintings. Who knew?


Six weeks later with a healed arm and heading into the holidays, she found joy in the many scissoring projects in her art book. Ibis has for some reason always had a bit of an obsession with cutting paper, so this was right up her alley. It only took me about two hours and several online tutorials to figure out how to fold the paper for paper snowflakes, which she then proceeded to learn in about five seconds. Kids have a way of making you feel old. We burned through a ream of paper in about a week as she practiced cuts to create various snowflake shapes; when you live in Florida I guess paper snowflakes have real appeal. In December she packed up her supplies and gave a demonstration to our 4-H club on making their own snowflakes. Everyone left with a wintry decoration and we managed to scatter about a thousand bits of paper all over the library (we picked them all up, I swear).


As fair time rolled around, Ibis decided to turn her paper snowflake project into a tabletop. Basically a tabletop is one of those three-paneled science fair boards turned into a visual report on a 4-H project topic. I wasn't sure how well something as basic as the folds for a snowflake would go over, but it won a blue award at the fair so the judges must have liked it. She was very proud of herself. It was funny seeing a board titled, "Let it Snow," in a sea of citrus and steer entries!


For the fair and another of her art projects she decided to make a papier mache Country Critter. Country Critters are made to look like specific animals using whatever materials you have on hand. She and Alexei chose to enter the small frame class which includes chickens and rabbits, at dimensions of 18" to 24" high and long. Thank goodness they didn't want to try their hands at making one of the giant cows! Since Ibis's art book already had an activity on papier mache, we decided to try that medium for the rabbits. None of the kids had ever seen anything like homemade flour paste before, and their reactions were priceless! It was a long and slow process waiting for each layer to dry, but in the end the kids' rabbits looked really cute. Ibis decided at the last minute to glue on cotton balls to make it more authentically fluffy like her real rabbit model, Snowball. It was a wise move because her Country Critter rabbit took Reserve Grand Champion at the fair and won a trophy!


Because we didn't have nearly enough else to do in February with the fair, she also entered another of the art book's activities, a cute 3-D flower painting, as well as about 567 other things. My kids love the fair.


Since we homeschool, the art book tied in nicely as a fun Friday activity already pre-planned for us during the spring months. Gotta love using 4-H as homeschool curriculum! First Ibis, Coral, and Hobie experimented with all sorts of different "brushes" for painting, including cotton balls, Q-tips, a toothbrush, a wad of aluminum foil, a straw for blowing, and a string. The string art was Ibis's favorite and Coral really liked blowing paint around with the straw. Hobie just enjoyed doing whatever his sisters did, hair bows and all.


Her final activity was learning to create contour drawings of familiar objects. She chose a stapler and she drew the very basic, simple outline from different angles and then turned the shape into an imaginary creature. It turned out really neat! This was one of my favorite art projects since it combined something practical like the drawing with something super fun. This is a project I could see us repeating a lot.


Like all 4-H projects, this included the requisite paperwork and record keeping. We attached photos of each project to showcase her work rather than the work itself since most of it wouldn't have fit in the project folder. I know Ibis has big plans for more creative works this summer!


Now we just need to go to McDonald's and eat more ice cream sundaes because we've depleted our supply of paint water cups (the sundae lids). Ahhh the sacrifices we make for our children....


Wednesday, May 2, 2012

4-H : a year with rabbits

With three out of four kids now owning rabbits, this was a big year for us in 4-H. Alexei and Ibis attended two 4-H rabbit shows and we had two litters of babies, the first unsuccessful and the second a big old fluffy pile of cuteness. Of all the 4-H animal projects this one is probably the easiest and most popular, especially with the younger kids!


For the first time last November our county decided to host a district rabbit and poultry show, meaning it was open to 4-H kids in all 6 counties in our area instead of just our county. A 4-H show is really great because it includes more than just handing over your rabbits to a judge to decide who has the best conformation. Since it's all about kids and learning, the rabbits themselves are judged one by one against a standard that takes into account the rabbit's care and condition, and then the best rabbits go on to further rabbit-to-rabbit competition. The kids can also enter showmanship, where they individually go up in front of the judge and demonstrate knowledge of handling and scoring a show rabbit. Finally, they can take the skill-a-thon, which is a written test of rabbit parts, breeds, nutrition, and general knowledge. Lots of learning going on!

At the show, Alexei took his American fuzzy lop buck and doe to the table and won two blues. His buck took Best of Breed. Ibis showed her Netherland dwarf buck and received a blue. Alexei also showed Coral's Netherland dwarf doe and she got a blue, then went on to take Reserve Junior and then Reserve Grand Champion. It was really exciting watching the judge go back and forth between Candy and another rabbit trying to decide on that Reserve placing! Coral was grinning ear to ear. She can start showing rabbits in the fall and can hardly wait.


The kids practiced hard for the skill-a-thon and Alexei surprised us all by winning the first place trophy in the junior age group. See, homeschoolers can take tests, too ;)


Our other big rabbit show was at the fair in February. The fair is super exciting but also means leaving the rabbits on grounds and going to feed them every single day for ten looooong days. I'm never sure who's happier to have them home afterwards, the rabbits or us! At the fair Alexei only showed his buck, who took a blue. He also came in second place for junior showmanship. Ibis showed her buck and Coral's doe to reds. She tried showmanship and was so nervous!


As a brand new class this year, rabbit costume was added. It was so much fun! We thought long and hard about costumes and Ibis finally went with dressing her rabbit as a "buck" (dollar bill) and herself as a banker, and Coral gave Alexei the idea to dress his rabbit as a "lopster" and himself as a fisherman. Alexei took 1st in the junior class and Reserve Grand overall. That was by far the most fun we've had showing rabbits!


Finally the fair wound down to skill-a-thon day. The kids had lots of fun practicing at home; I'd ask questions from their study guide and toss marshmallows at them for correct answers. In spite of the sheer mayhem of the rabbit/chicken activities going on around them as they took the test, Ibis massively improved her score from the November test and wound up with the 3rd place junior ribbon! Alexei also did a great job and earned 2nd place. A fellow homeschooler came in 1st. Apparently marshmallows open minds. Who knew?


After the fair we decided to try breeding Ibis's buck to Coral's doe in the hopes of some Netherland dwarf babies. Surprisingly in March Candy had one stillborn baby and 3 little healthy bundles that have quickly grown into adorable little fuzzballs. This baby bunny stuff could be seriously addicting!


The 4-H year wrapped up with the completion of the project books. They finished their 6 activities each on rabbits, looked over photos from their club demonstrations, and shared about their leadership and community service. It was a great reminder of what they had accomplished and they're already planning out their costumes for the big region-wide show in October!


I wonder if they'd do chores for marshmallows?